Installation and first launch
Run the installer, click a few buttons in the 5-step welcome guide that appears first, and you're ready to go. Your photos stay where they are; only the list of photos found and their thumbnails are created on this PC.
On this page
When to use itInstallingFollowing the welcome guide (5 steps)After you start — photos fill inScreen tourSeeing the welcome guide again · changing the scopeUpdatingUninstalling (Windows)Keyboard shortcutsGood to knowFrequently asked questionsRelated topicsWhen to use it
- When you install photoKam Radar for the first time.
- When you want to see the welcome guide again or change where to look for photos.
- When you update to a new version or uninstall the app.
Installing
Windows
Requirements: Windows 10 · 11 (64-bit), about 320 MB for the installer. You don't need an internet connection to install or use the app.
- Get the Windows installer (
.msi) from the Download page on our website. - Double-click the downloaded file. The installer is in English.
- Go through the steps in order.
| Step | Installer screen | What to do |
|---|---|---|
| 1 | Welcome | Next |
| 2 | End-User License Agreement | Read the terms (the Korean text comes first) and check I accept the terms in the License Agreement → Next |
| 3 | Destination Folder | Leave it as it is and click Next (default C:\Program Files\photoKam Radar) |
| 4 | Ready to install | Install → Yes in the Windows permission prompt |
| 5 | Completed | Finish with Launch photoKam Radar checked |
When installation finishes, a photoKam Radar icon appears in the Start menu and on the desktop, the app opens right away, and the welcome guide below appears.
macOS
Requirements: a Mac with Apple silicon (M series), macOS 13.3 or later.
- Double-click the downloaded
.dmgfile. - Drag the photoKam Radar icon into the Applications folder.
- Launch it from the Applications folder. If you're asked to confirm opening an app downloaded from the internet, click Open.
On macOS, press ⌘ (Command) wherever this guide says Ctrl.
Following the welcome guide (5 steps)
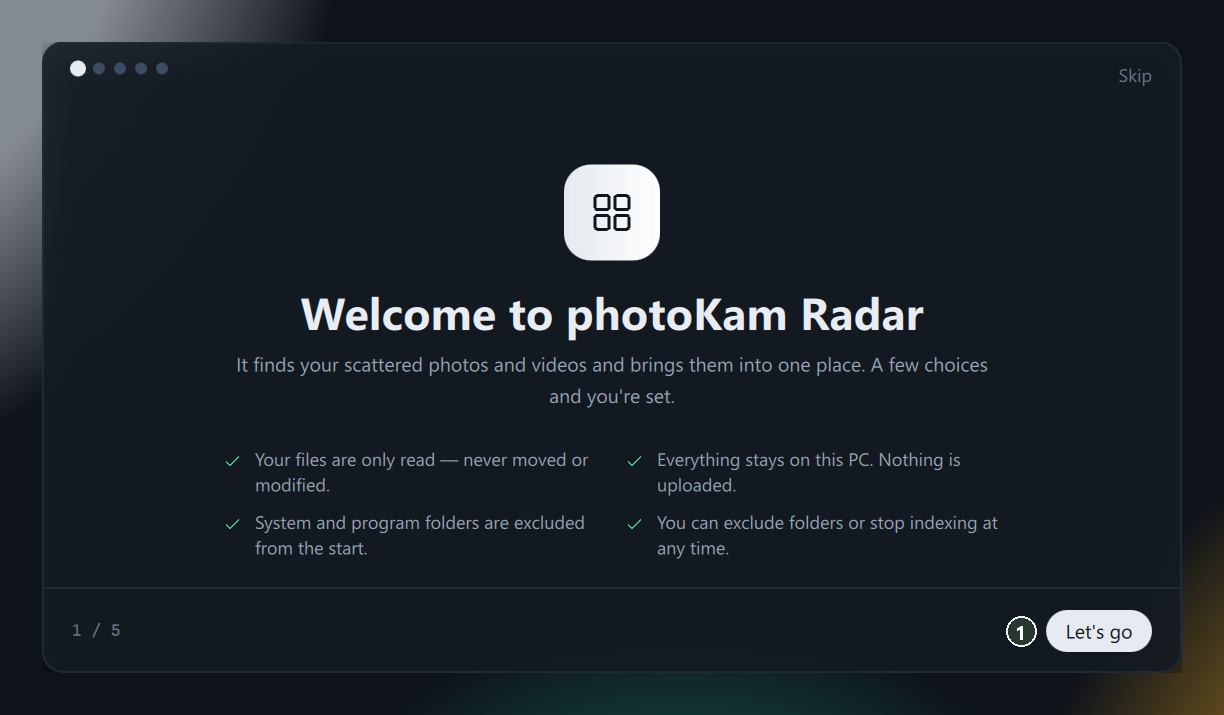
On first launch, the guide below appears in the middle of the window. The five dots at the top show which step you're on.
Step 1 — Welcome
Read the getting-started guidance (your originals are never changed · system folders are excluded · you can stop any time) and click ① Let's go.
Step 2 — Where should we look?
If your photos are kept in a few folders (recommended):
- Click ① A few folders.
- Choose your photo folders with ② Choose folders. You can click it again to add more.
- ③ The folders you chose appear as chips like this. Click × to remove one.
- Click ④ Next.

If you're not sure where your photos are, choose ① The whole computer. It searches every connected drive (for example C: · D:). Windows and program folders, as well as cloud and network drives, are excluded from the start.

You don't have to choose now. You can add folders later on the Volumes screen on the left, and change the scope in Settings (see "Changing the scope" below).
Step 3 — How would you like to view?
Choose how the photo list is shown and click Next.
- ① Grid — thumbnails of the same size. Good for skimming quickly.
- ② Tiles — fills each row at the photos' own aspect ratios. Good for enjoying your photos.
- ③ List — file name · date · camera in rows. Good for organizing and comparing.
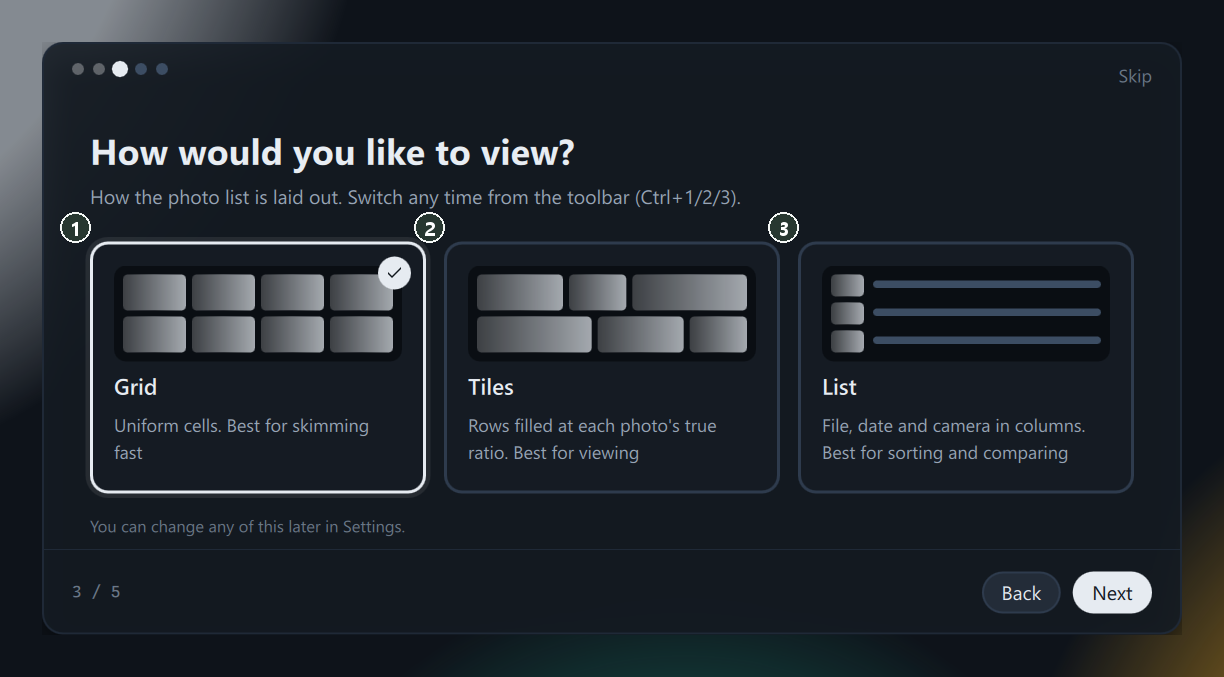
You can switch any time later with Ctrl+1 · Ctrl+2 · Ctrl+3.
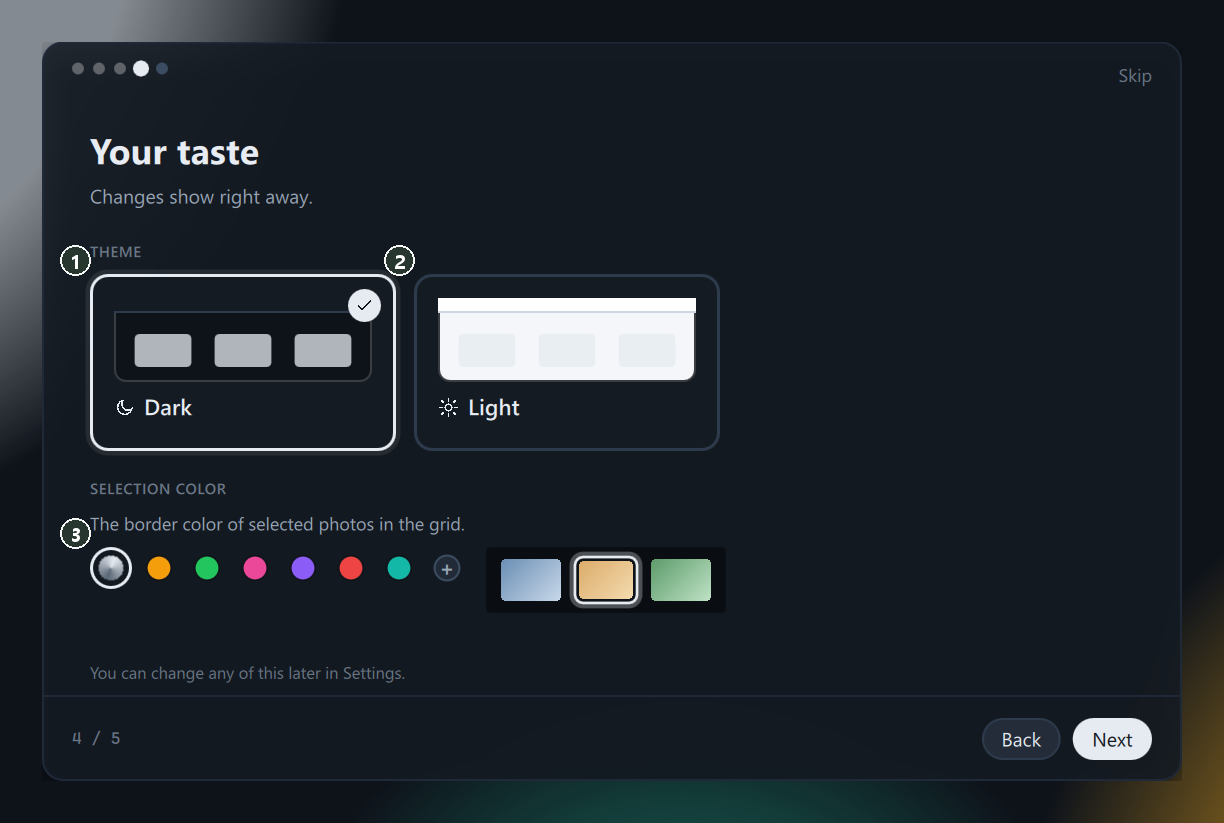
Step 4 — Your taste
- ① Dark / ② Light — the screen colors change as soon as you click.
- ③ Selection color — the border color around selected photos. Of the three small pictures on the right, the middle one shows how a selected photo looks.
Step 5 — All set
- ① Shows your choices one more time.
- ② Finding photos quietly continues in the background even after you close the app, and pauses while you use your computer for other things.
- ③ Take a tour — continue with the screen tour (below) as you start.
- ④ Start — saves your choices and, only at this point, starts finding photos.

After you start — photos fill in
When you finish the guide, the gallery opens and the photos found appear one after another.
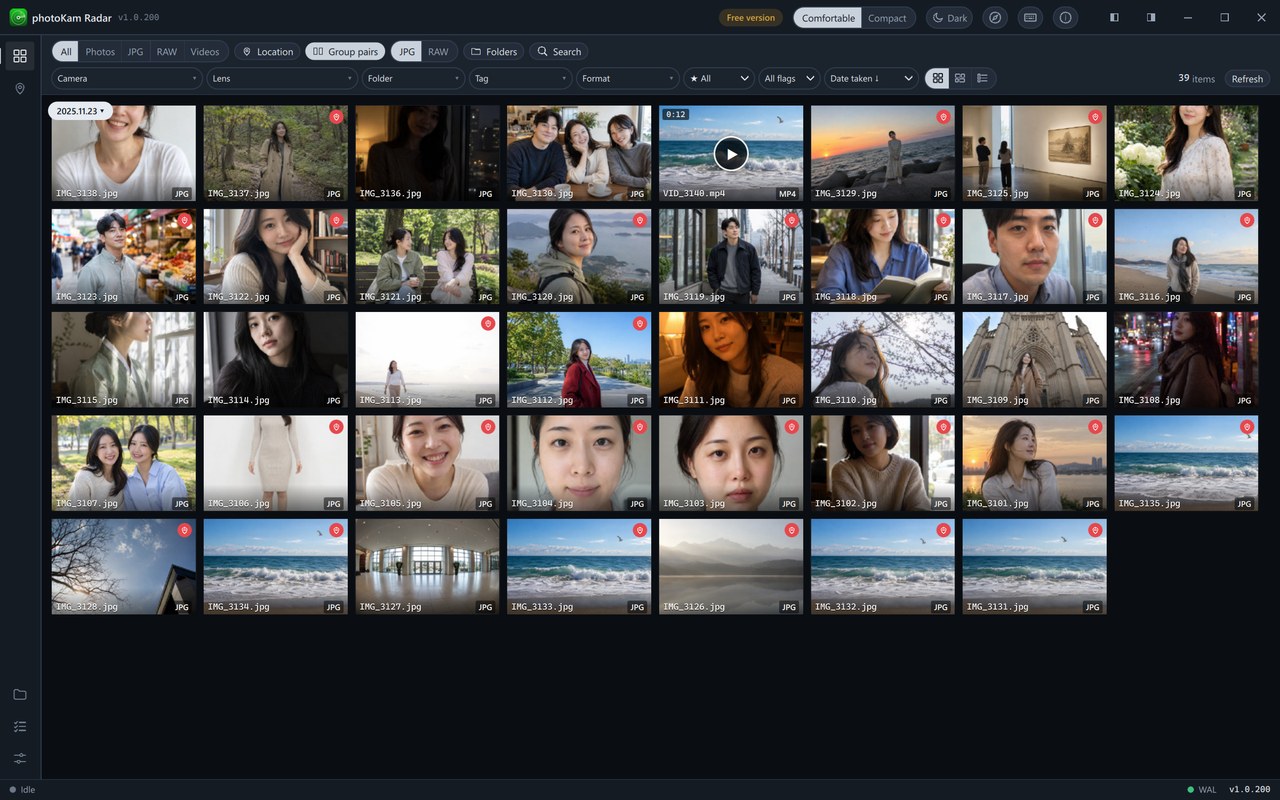
- The status bar at the bottom left of the window shows Scanning folders… → Reading photo information… → Creating thumbnails… in turn. When everything is done, it shows Idle.
- When new photos are found, the button at the top right of the gallery changes to N new photos · Refresh. Click it or press F5 to add them to the list (this keeps the list from suddenly shifting while you're looking at it).
- If you chose The whole computer, the Pictures and DCIM folders are searched first, so familiar photos show up quickly.
Screen tour
If you choose Take a tour, the buttons on the screen are highlighted and explained one by one (10 steps in all). Move through it with Next · Back · Skip in the speech bubble. To see it again later, click the compass button (Feature tour) in the top bar.

Seeing the welcome guide again · changing the scope
To see the welcome guide again: Settings at the bottom left (or Ctrl+,) → in About at the very bottom, click ① Show again. The last button changes to Save.

To change only where photos are searched for: Settings → under Background indexer, in ① Where to look, click A few folders or The whole computer. Finding photos starts over with the new scope.

Updating
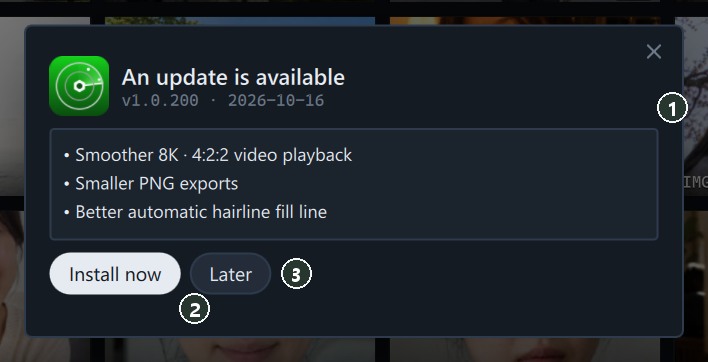
A few seconds after you open the app, it checks in the background for a new version. If there is one, this window appears.
- ① What's changed in this version.
- ② Install now — downloading → checking the file → installing all happen automatically, and the new version reopens when installation is done.
- ③ Later — closes the window for this session only. You'll be reminded the next time you open the app.
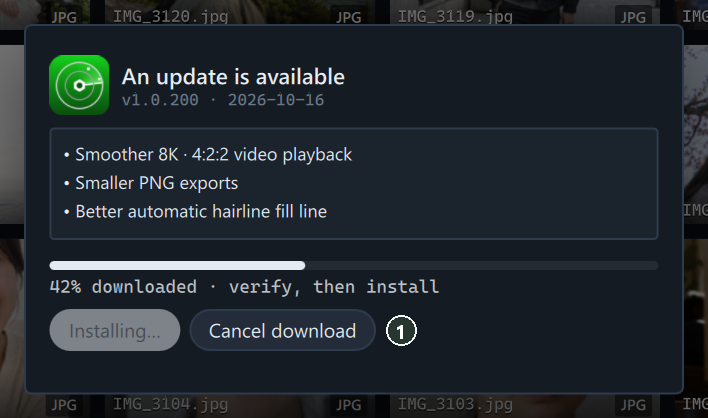
While downloading, a progress bar and percentage are shown. To stop, click ① Cancel download. If it fails, the button changes to Try again.
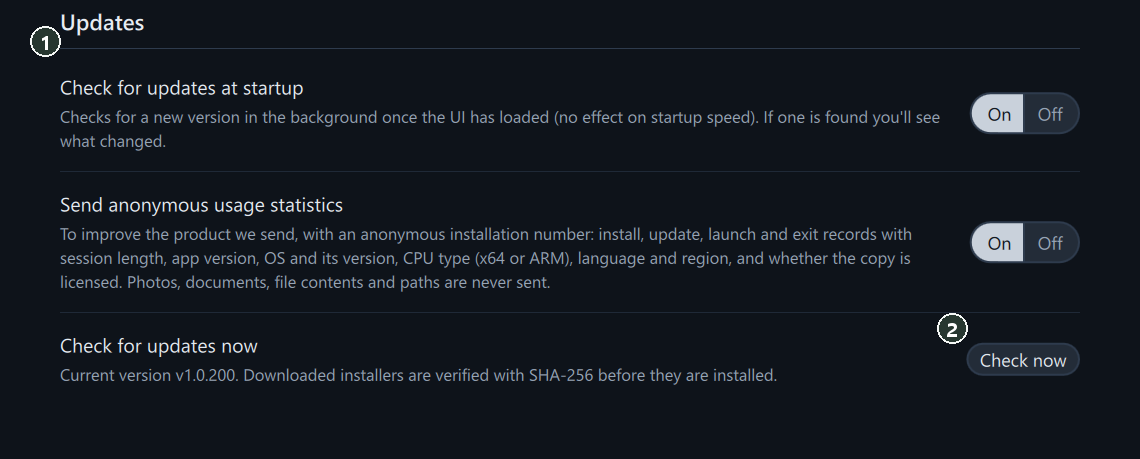
To check yourself, go to Settings → Updates and click ② Check now. If you turn off ① Check for updates at startup, the app won't check when it opens.
Uninstalling (Windows)
- In Windows Settings → Apps → Installed apps (Apps & features on Windows 10), find photoKam Radar and click Uninstall.
- The running app and the background indexer are closed along with it.
- Ratings · flags · tags · edits and your license stay on the PC. If you reinstall, you can pick up right where you left off. Your original photos, of course, stay as they are.
Keyboard shortcuts
| Where | Key | Action |
|---|---|---|
| Welcome guide | Enter | Next step (Start on the last step) |
| Welcome guide | ← · → | Previous · next step |
| Screen tour | → · ← · Esc | Next · previous · close |
| Anywhere | Ctrl+, | Open Settings |
| Anywhere | F1 | Open this guide |
Good to know
If your photos are organized in one or two folders, A few folders is quieter and faster.
You can change how fast photos are found by clicking the text on the left of the status bar and choosing Eco · Balanced (default) · Performance (Screen layout).
Finding photos pauses automatically while a full-screen game or video is running, while you're on battery, or when disk space runs low.
If you click Skip in the welcome guide, finding photos may not start. If you see a red dot and Indexer is off in the status bar, go to Settings → Background indexer and click Restart.
Finding photos continues even after you close the app. To keep it from starting automatically when you turn on your computer, turn off Settings → Start automatically at logon.
The app closes automatically during an update or uninstall. If you were editing, click Done first.
Frequently asked questions
Does installing copy my photos somewhere else?
No. Your photos stay where they are; only organizing information such as the list, thumbnails and ratings is created separately on this PC.
I have a huge number of photos. How long does it take to find them all?
It depends on how many photos you have and how fast your disks are. While you're using the app, Balanced aims for about 120 photos a minute and Performance for about 600, and it speeds up when you step away.
I chose the wrong scope.
Follow "Seeing the welcome guide again · changing the scope" above.
When do I need an internet connection?
A connection is needed to load map images, check for updates, and download extra models or the recognition pack. See Showcase for online sharing.
I clicked Later, but it keeps coming back.
Later closes it for this session only. A version marked This update is required. must be installed; it has no Later.