Jump to date · Map
Jump to date lets you pick a date such as "December 25, 2024" in a long list and go straight to that spot. The list stays as it is; only your viewing position moves. Map shows photos with location data (GPS) as pins; click a pin to view that photo large.
On this page
Watch the videoWhen to use itJump to dateMapViewing the location of a single photoKeyboard shortcutsGood to knowFrequently asked questionsRelated topicsWhen to use it
- When you want to go straight to around "last Christmas" without scrolling through tens of thousands of photos.
- When you want to see at a glance when the photo you're looking at was taken.
- When you want to see where your travel photos were taken on a map and open the photos from that spot.
Jump to date
Step 1 — Click the date button
Click ① the date button at the top left of the photo list (Ctrl+G). The button shows the date of the photo at the top of the screen right now.
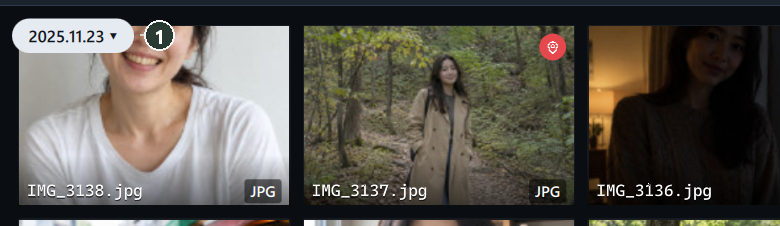
The date button is shown only when the sort is Date taken ↓ · Date taken ↑.
Step 2 — Pick a year · month · day and click Go
The Jump to date window opens. The year and month you're viewing are already selected.
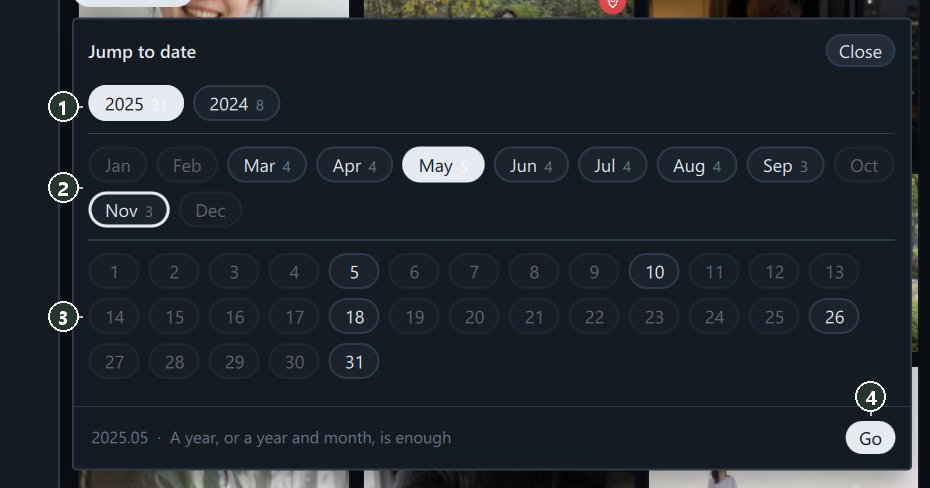
- Click ① a year. The small number next to it is the number of photos in that year.
- Click ② a month. Months without photos are dimmed and can't be clicked.
- Click ③ a day (you can pick one or not).
- Click ④ Go (Enter). The window closes, the list moves to the first photo of that day, and that photo is selected.
- Clicking only selects. You actually move only when you click Go.
- You can also pick just a year, or just a year and month, and click Go — you'll go to the start of that period.
- Click a selected month · day again to deselect it.
- An accent-colored border marks where you're viewing now, and a filled button marks the date you've picked.
Map
Click Map in the left sidebar to see photos with location data as pins on a map. At first, the map is fitted so that all pins fit on one screen.

- ① The number of photos with location data.
- ② Cluster pin — nearby photos grouped into one. The number = number of photos (color: green under 10 photos · yellow under 100 · orange for more). Click it to zoom in to that spot.
- ③ + · − — zoom in · out. The wheel · double-click · dragging work too.
- ④ Map attribution (click it for the information page).
Zoom in far enough and each photo appears as a blue dot. Hover over a blue dot to see the file name; click it to open that photo in the full view. The filmstrip at the bottom continues with the photos in the same folder.
Viewing the location of a single photo
- In the gallery, click a photo with a location pin (red icon).
- In the GPS row of the Details panel on the right, click ① Show location.

- The map window opens. Click Google Maps · OSM at the top to open those coordinates in your browser. Click ✕, press Esc or click outside the window to close it.
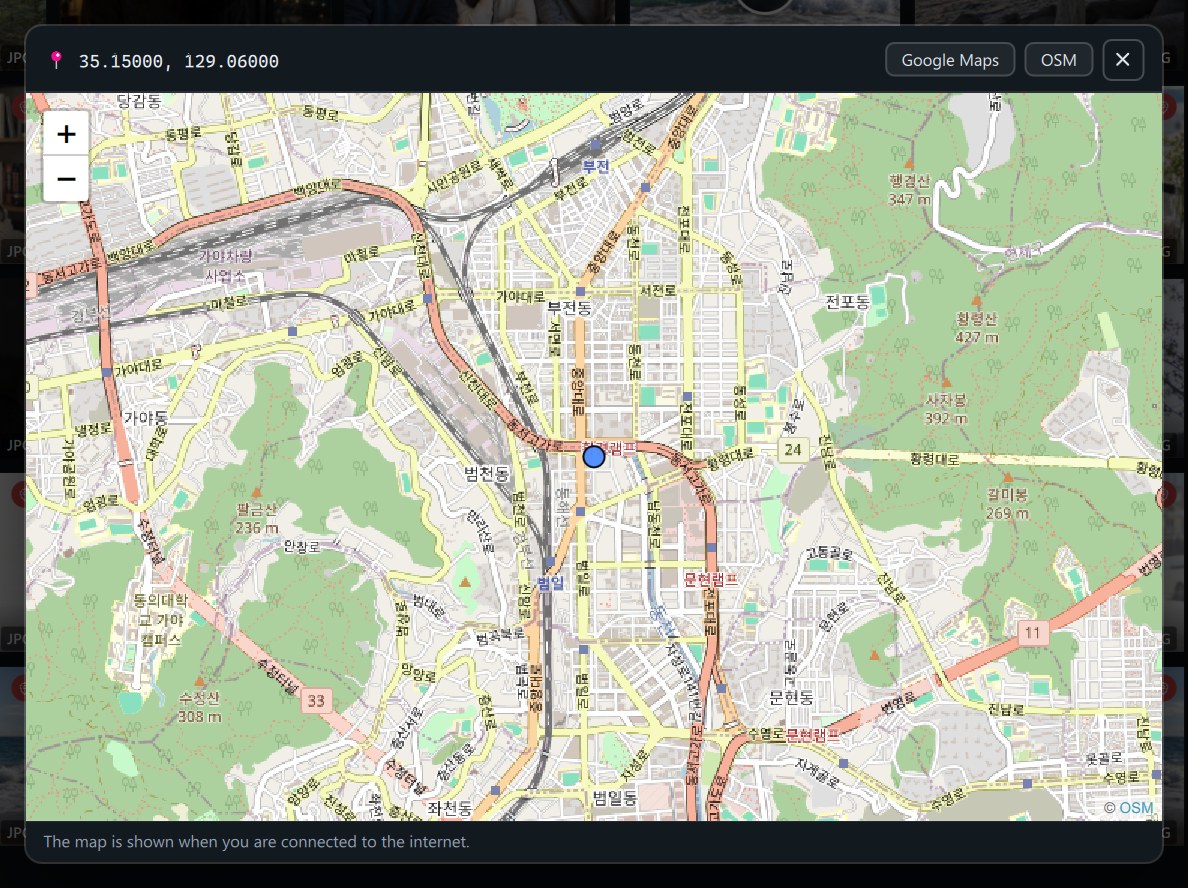
You can also open the same window by clicking Expand on the small map in the full view's information panel.
Keyboard shortcuts
| Where | Key | Action |
|---|---|---|
| Gallery | Ctrl+G | Open · close the Jump to date window |
| Date window | Enter | Go (move to the picked date) |
| Date window · map window | Esc · click outside | Close |
Good to know
The photo counts in the date window are based on the current list. If you've filtered by camera · folder and so on, it counts within those results and moves within them.
"The start of the period" follows the sort. With Date taken ↓ (newest first) it's the photo taken last in that period; with Date taken ↑ it's the photo taken first.
The map shows all photos that have a location, regardless of the gallery filters. To see only photos with a location in the gallery, turn on Location on the toolbar.
Photos without a date taken (screenshots and so on) are placed by their file date.
The background map is shown when you're connected to the internet (pins are shown either way).
Frequently asked questions
I don't see the date button.
Change the sort to Date taken ↓.
Some months are dimmed and can't be clicked.
The current list has no photos from that month. Removing filters may bring them back.
I want to see only the photos from that period.
Jump to date only moves your position. To filter by period, use Date taken in the search panel (Search and filters).
My RAW photos don't appear on the map.
Try clicking Fill in RAW location data on the Jobs screen (Screen layout).
These are phone photos, but they're not on the map.
Location recording may have been off when you took them, or the location may have been stripped when they went through a messenger · editing app. Check the GPS row in Details.